
A WORSLEY 02
|
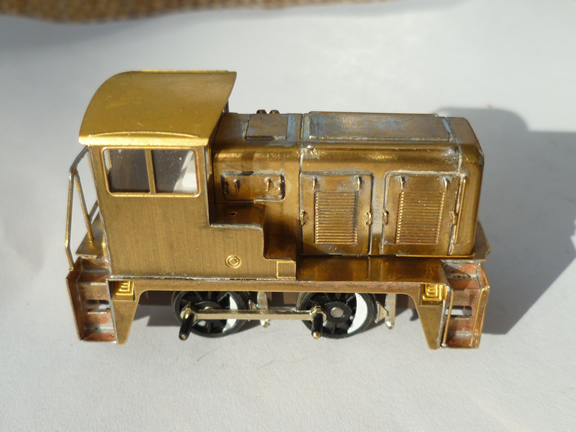 |
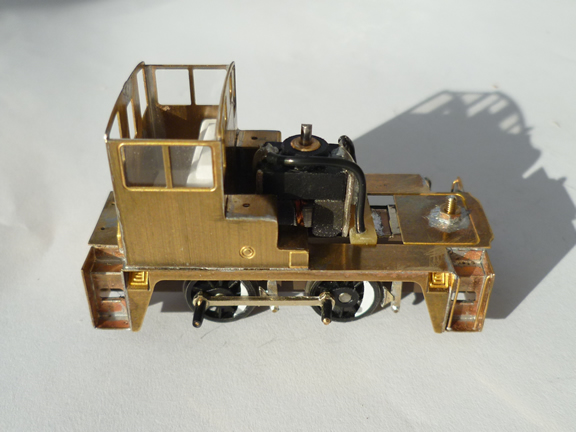
This is a quick build of a Worsley Works 02 Class diesel shunter for 12mm gauge. In addition to the etching, I used a Finney & Smith M100 motor, Society 10.5mm-diameter fine-scale wheels gauged for 12mm, a worm and wheel from Greenweld, an internet hobby shop, and various bits of wire, plastic, screws and the like. All the access covers and handles were soldered to the engine cover and then it was folded to shape. The radiator grille of the engine cover was clamped face down to a piece of wood and a good fillet of solder run along the inside joint of the cover and grille. This allowed the curved front edge to be filed on the outside of the bonnet. The footplate, with cab, was assembled next with a nut soldered at the front for holding the body to the chassis. I altered the shape of the fuel tanks as all the pictures I could find had square corners. The chassis has very little clearance for l/8in axles and bushes, so these were replaced by 2mm silver-steel rod and bushes, to match the bore of the fine-scale driving wheels and the plastic gear wheel. The gears are the same as those used in the Society diesel chassis kits and the worm must be sleeved with 2mm outside-diameter brass tube to fit the 1.5mm motor shaft. Even though the gears claim to be 2mm bore for fitting to 2mm shafts, it is worth running a 2mm drill through them - I had two gears on another chassis, which were not drilled out, split several months after fitting. The motor will need one end of its shaft cutting off to clear the bonnet. I covered the motor with clingfilm for dust protection and cut the shaft with a slitting disc in a mini drill. These shafts are hard and it is worth stopping every few seconds to let things cool down. Remember to use eye protection when using a slitting disc, as they are very fragile. |
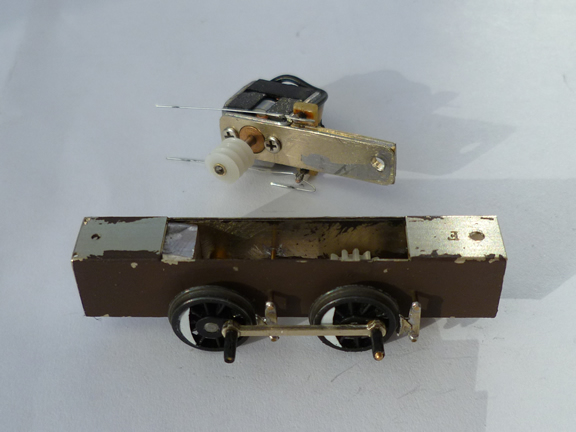
| The Ml00 motor sits between the fold-up chassis frames, so I laminated a few offcuts of brass to the required thickness to form a mounting bracket. I used a piece of brass rod to locate the cab end of the chassis and a single screw at the front. Pick ups were mounted on the motor bracket, using a small piece of pcb. The motor and pick-up assembly can be removed as one unit for maintenance and is held in place by the chassis sides and the same screw which holds the body on the chassis. |
 |
| I did not know of a casting set for this engine, so I made my own from low-melting-point white metal. Simple plastic masters were used to form silicone rubber moulds similar to those for resin casting. I tried to get as much weight as possible into this very small kit to improve the pick up from the track and prevent wheel spin. There are ballast weights in the bonnet, the fuel tanks and between the chassis under the cab. The buffers and other small items are also metal castings to add weight. The total weight is about half that of a Triang Jinty, which for something this size is good. |
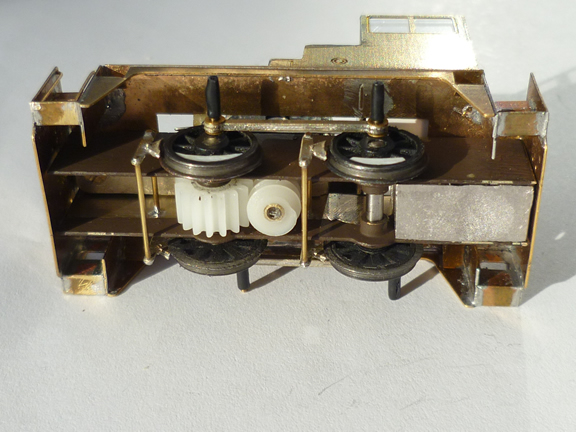 |
02 UNFROCKED The view from beneath shows the plastic gearset, correctly meshed
thanks to a home-crafted |
 |
Reproduced from the 3mm Society Magazine "MIXED
TRAFFIC" 187 - April 2012 by kind permission of the Editor and
Chris Ketley
|